Part my Sudoku Board Generation Series:
- Part 1: Structure & Algorithm
- Part 2: Implementation Comparison
- Part 3: Rust for WebAssembly
- Part 4: C++ for WebAssembly
In the last installment, I outlined how the Rust implementation was modified to support usage as a WASM module and within a native binary. In this post, I’ll be doing the same for the C++ implementation.
The source code for this post can be found here.
Installing Tools
These instructions were modified from the WebAssembly Developers guide
Later steps will require a recent Node runtime to be installed. To do so … search “Install Latest Node” and follow those instructions. There are a number of ways to do so. You could use your system’s package manager, NVM, the binary from the project webpage. Whatever you like is probably fine.
The instructions for installing the Emscripten Toolkit (EMSDK) involve cloning source code. When building or installing from source, I like to organize those files underneath ~/src. This keeps those files from polluting the rest of my home directory, or the wider filesystem. To download and install the EMSDK, run the following commands:
cd ~/src
git clone https://github.com/juj/emsdk.git
cd emsdk
./emsdk install latest
./emsdk activate latest
This installs and activates the tools in the current terminal session. So we should be able to check the current version.
> emcc --version
emcc (Emscripten gcc/clang-like replacement) 1.38.20 (commit 7a0e27441eda6cb0e3f1210e6837cae4b080ab4c)
Copyright (C) 2014 the Emscripten authors (see AUTHORS.txt)
This is free and open source software under the MIT license.
There is NO warranty; not even for MERCHANTABILITY or FITNESS FOR A PARTICULAR PURPOSE.
Perfect! Now to configure the environment for future sessions, we append the following to ~/.profile.
~/src/emsdk/emsdk_env.sh --build=Release
Note: When using iTerm, I noticed that adding the above in OSX causes the environmental variables to be printed at the top of a new shell session. The tools still work, it’s just a little annoying. I might have to come back to this.
Hello From HTML
These instructions were also modified from the WebAssembly Developers guide
Now that we have the tools installed, and because the existing implementation doesn’t use any libraries (outside of the standard), compiling the C++ program to run as WASM should be straightforward. We can build for WASM with the following command.
emcc -std=c++1z main.cpp -s WASM=1 -o out.html
You’ll notice that, rather than clang or g++, the emcc compiler is used. This compiler wraps LLVM front-end and provides additional features that are helpful when building to WASM. The -s WASM=1 flag lets emcc know that our compiler target is WebAssembly rather than http://asmjs.org/, an older standard developed by Mozilla. Finally, the output file is set with -o out.html. Rather than a single output file, this actually generates three:
out.html- (seen below) HTML file that loads and runs the module.out.js- JavaScript file that loads and compiles the WASM module for use within the HTML file.out.wasm- the actual module output
We can load and run the application through a simple HTTP server.
python2 -m SimpleHTTPServer 8080 # if you don't have python2... what are you doing?
We should then be able to see our program by visiting localhost:8080/out.html.
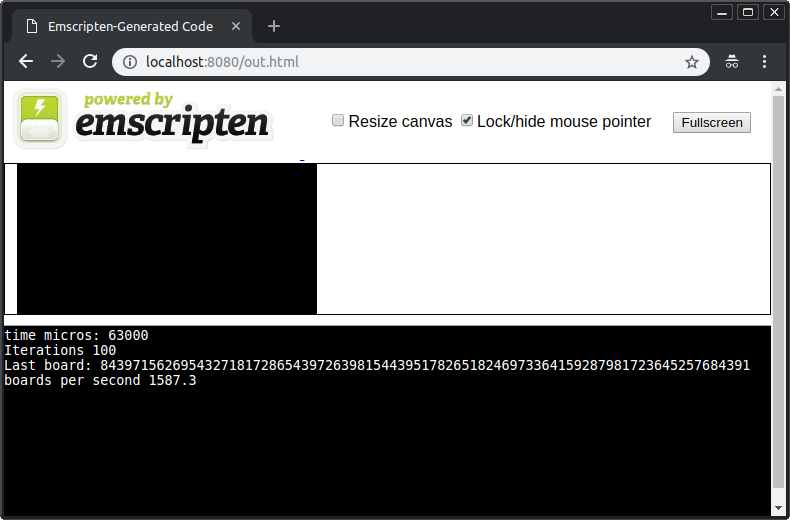
Pretty cool. The program runs in the browser without any additional work on our part. It’s not accessible to JavaScript world, but we’ll get to that next.
Extracting To A Module
The instructions for this section were modified from Emscripten’s Porting Documentation, the Embind Documentation, and the example code found here.
In a future post, I’m going to benchmark the various implementations under different conditions: number of iterations, board size, and different solving algorithms. This is a lot easier to orchestrate when using Node as the runtime, rather than through a web browser. This requires the generator code to be extracted into a separate “module” (not a literal C++ module, more like a separate source and object file).
The module Interface I want to be exposed to JavaScript is as follows.
SudokuBoard generateAndFillBoard();
void generateAndFillBoards(int numBoards);

class SudokuBoard {
public:
    std::string serialize();
};
class SudokuBoard {public: std::string serialize();};
This API includes two functions, one user-defined type, and a method on that type. The generateAndFillBoard function returns a SudokuBoard instance with a valid solution populated. Calling serialize on that object will return a string representing the board’s values. The generateAndFillBoards function calls generateAndFillBoard repeatedly and then returns. This last method will be used to test the cost of calling between JavaScript and C++.
In order to make this interface available in both WASM and Native (Linux / OSX in this case), we need to extract this code to a separate source file and create a corresponding header file sudoku-gen.h.
rharriso/sudoku-gen-cpp _sudoku gen cpp. Contribute to rharriso/sudoku-gen-cpp development by creating an account on GitHub._github.com
In the linked code, you’ll notice quite a bit more than our desired public API. coord, SudokuCell and the additional SudokuBoard members are part of the definitions of the public API functions, and so have to be part of the declaration.
With the header declared, we can move the implementation to sudoku-gen.cpp with no modification other than adding scoping to the member functions of each user defined type.
rharriso/sudoku-gen-cpp _sudoku gen cpp. Contribute to rharriso/sudoku-gen-cpp development by creating an account on GitHub._github.com
You’ll notice a lot of similarities to the header file. This is less than ideal both because there is a lot of repetition, and because it isn’t clear what functions should be used. Even the private members are part of the header! Compare this to Rust, where the pub keyword is used to control visibility.
Note: C++ Modules are going to be part of upcoming versions of the language. That should improve the above situation.
Enough griping! Let’s get a move on.
Add Bindings with EMSCRIPTEN_BINDINGS
The instructions in this section are derived from the Embind documentation and from the Emscripten Frontend Documentation.
Bindings are a way of connecting different programming languages and runtimes together. To do this we’ll be using Embind. This library uses an EMSCRIPTEN_BINDINGS block, and a set of functions under the emscripten::* namespace to generate JavaScript bindings for specific functions at compile time.
The bindings for our interface looks as follows.
https://gist.github.com/rharriso/ef3714017149465b60bd43f2b26d6d73
The first two lines of the block create bindings for our generator functions. The first argument of emscripten::function is the name that will be provided to the JavaScript module. The last two link of the block export the interface under the SudokuBoard type. The type itself is bound, and the serialize function is exposed as well.
Adjusting the build to Bind and Modularize
Now that our bindings are defined, we have to adjust the build script to take advantage of them. The new build command is as follows.
emcc --bind -o sudoku-gen.js -std=c++1z main.cpp -s WASM=1 -s MODULARIZE=1
This is nearly the same command as before, with a couple of additions and one change. The --bind flag tells emcc to use Embind. The -s MODULARIZE=1 option wraps the emitted WASM in a module. This keeps the global namespace from being polluted when working with many modules.
Finally, the output file is changed to sudoku-gen.js. We’ll only be emitting two files, sudoku-gen.wasm and sudoku-gen.js.
Loading and Running in a Node Script
After adjusting the source code and the build commands, we need a JavaScript application to load and run our module code. This is pretty straightforward sudoku-gen can be required like any other module, except it needs to be executed and awaited in order to use its contents.
Along with some (extremely) basic argument handling, the sudoku-gen module is required, executed, and then after awaiting the contents, the members can be used. We can finally use our generator in node!
> node hello.js 5

7|5|9|1|3|8|2|6|4|4|8|3|7|6|2|5|9|1|2|1|6|9|4|5|8|3|7|5|2|8|4|1|6|9|7|3|6|7|1|2|9|3|4|5|8|3|9|4|8|5|7|1|2|6|8|3|7|5|2|4|6|1|9|1|4|5|6|7|9|3|8|2|9|6|2|3|8|1|7|4|5|
9|2|7|1|5|8|4|3|6|1|6|5|7|4|3|9|2|8|4|3|8|6|9|2|5|7|1|7|9|4|3|8|5|1|6|2|6|8|3|2|1|9|7|5|4|2|5|1|4|7|6|3|8|9|3|7|2|9|6|1|8|4|5|5|1|6|8|3|4|2|9|7|8|4|9|5|2|7|6|1|3|
9|2|7|8|4|6|5|3|1|5|8|1|3|7|9|4|2|6|4|3|6|2|1|5|9|8|7|1|6|8|4|9|7|3|5|2|3|7|4|6|5|2|8|1|9|2|9|5|1|8|3|7|6|4|6|1|9|7|3|8|2|4|5|8|5|2|9|6|4|1|7|3|7|4|3|5|2|1|6|9|8|
2|3|5|7|6|9|1|4|8|9|6|7|4|1|8|2|5|3|8|4|1|5|3|2|6|7|9|1|5|3|6|2|4|8|9|7|4|8|2|1|9|7|5|3|6|7|9|6|8|5|3|4|1|2|5|2|9|3|4|6|7|8|1|6|1|8|9|7|5|3|2|4|3|7|4|2|8|1|9|6|5|
5|9|8|3|1|2|6|4|7|6|4|1|5|9|7|8|3|2|3|7|2|4|8|6|1|9|5|2|8|6|1|4|5|3|7|9|4|1|3|2|7|9|5|6|8|9|5|7|8|6|3|2|1|4|8|6|9|7|5|1|4|2|3|7|3|4|6|2|8|9|5|1|1|2|5|9|3|4|7|8|6|
Make work Natively … again
Like we saw in the Rust implementation. Our WASM build isn’t immediately compatible with our native build. The solution is similar in concept, and only slightly different in implementation.
To exclude portions of our header files from the native build we’ll use conditional inclusion. We’ll ifdef pragma to wrap the bindings we placed in the header.
And then we update our build script to define a WASM value when building for that target.
emcc --bind \
    -o sudoku-gen.js \
    -std=c++1z main.cpp \
    -s WASM=1 -s MODULARIZE=1
    -DWASM=true
The -DWASM=true flag defines a wasm value that can be used by the #ifdef pragma. It is the equivalent of placing#define WASM true in the header file, except can be toggled by the build command.
Now we can build and run our native binary as expected.
 make sudoku-gen
g++ -std=c++1z -O3 -c main.cpp -o main.o
g++ -std=c++1z -O3 -c sudoku-gen.cpp -o sudoku-gen.o
g++ -std=c++1z main.o sudoku-gen.o -o sudoku-gen

> ./sudoku-gen 5
time micros: 2269
Iterations 5
boards per second 2203.61
7|6|3|8|4|2|9|5|1|9|8|1|3|7|5|2|4|6|4|5|2|9|6|1|7|3|8|3|9|8|6|5|7|1|2|4|5|7|4|1|2|3|6|8|9|1|2|6|4|8|9|3|7|5|6|3|7|5|9|8|4|1|2|8|1|9|2|3|4|5|6|7|2|4|5|7|1|6|8|9|3|
3|1|7|9|6|4|5|8|2|5|2|8|7|1|3|9|4|6|4|6|9|2|5|8|7|1|3|1|5|6|4|3|7|8|2|9|9|8|3|1|2|5|4|6|7|2|7|4|6|8|9|3|5|1|6|4|5|3|9|2|1|7|8|8|3|2|5|7|1|6|9|4|7|9|1|8|4|6|2|3|5|
2|7|1|6|4|3|9|8|5|3|6|8|1|9|5|7|4|2|9|4|5|7|2|8|6|3|1|4|2|7|8|6|1|5|9|3|1|9|6|3|5|4|2|7|8|8|5|3|9|7|2|4|1|6|6|8|2|4|1|9|3|5|7|7|1|4|5|3|6|8|2|9|5|3|9|2|8|7|1|6|4|
3|5|4|9|6|1|7|8|2|9|1|7|5|2|8|6|3|4|2|8|6|7|3|4|1|5|9|4|9|5|2|1|3|8|7|6|6|7|1|4|8|9|5|2|3|8|3|2|6|5|7|4|9|1|1|4|8|3|7|2|9|6|5|7|6|3|1|9|5|2|4|8|5|2|9|8|4|6|3|1|7|
1|8|2|9|4|3|7|5|6|6|4|5|8|2|7|3|9|1|7|9|3|5|1|6|4|2|8|8|3|9|1|6|5|2|4|7|5|2|6|7|8|4|1|3|9|4|1|7|3|9|2|8|6|5|3|7|1|4|5|9|6|8|2|9|6|8|2|3|1|5|7|4|2|5|4|6|7|8|9|1|3|
Comparing to Rust Implementation
We saw some similarities to the Rust implementation. Specific functions and methods could be marked for binding. The C++ version used a library and compiler extensions, while Rust was able to handle this as a standard part of the language and toolchain. We also had to adjust the builds to accommodate the existing native builds. This was as natural for C++ as it was for Rust, only Rust wraps this all up as part of the Cargo toolchain, C++ requires you to bring your own build system.
The source ends up being quite a bit simpler for Rust. The C++ version repeats the public interface three separate times. Once as a definition in the header file. Once in the bindings block, and once again in the source file. This repetition isn’t just annoying, in larger applications it can lead to quite a bit of frustration and potential errors if the bindings aren’t kept up to date or are carelessly refactored.
One clear advantage that C++ has in the comprehensive documentation. C++ was one of the first languages supported by WASM, and so it had a lot more reference material. And the Emscripten documentation very thorough.
What Next
Next time, I’ll be wrapping up this initial sudoku board cycle with a benchmark of the different implementations and their variations. I’ll be looking that various C++ and Rust builds as well as a Typescript Implementation for a baseline. I’ll be looking at CPU and Memory Usage the various implementations and features.
See you then.